'%3e%3cg%20clip-path='url(%23roundHexB)'%3e%3cpath%20fill='%236D5DFC'%20d='M256%2040%20443%20148%20443%20364%20256%20472%2069%20364%2069%20148Z'/%3e%3cpath%20fill='%239C93FB'%20d='M69%20148%20256%2040%20443%20148%20256%20256Z'/%3e%3cpath%20fill='%234A3FD1'%20d='M256%20256%20443%20148%20443%20364%20256%20472Z'/%3e%3c/g%3e%3c!--%20top%20face:%20filled%20round%20magnifier%20--%3e%3cg%20transform='matrix(0.8660254,-0.5,0.8660254,0.5,69,148)'%3e%3cg%20transform='matrix(0.935,0,0,0.935,7.02,7.02)'%3e%3ccircle%20cx='88'%20cy='88'%20r='52'%20fill='%23FFFFFF'/%3e%3ccircle%20cx='88'%20cy='88'%20r='28'%20fill='%239C93FB'/%3e%3cpath%20d='M124%20124%20164%20164'%20stroke='%23FFFFFF'%20stroke-width='26'%20stroke-linecap='round'/%3e%3c/g%3e%3c/g%3e%3cg%20transform='matrix(0.8660254,0.5,0,1,69,148)'%3e%3cpath%20d='M96.1,61.08%20L45.9,128.92%20Q34,145%2054,145%20L162,145%20Q182,145%20170.1,128.92%20L119.9,61.08%20Q108,45%2096.1,61.08%20Z'%20fill='%23FFFFFF'/%3e%3c/g%3e%3c!--%20right%20face:%20filled%20bubble%20--%3e%3cg%20transform='matrix(0.8660254,-0.5,0,1,256,256)'%3e%3cg%20transform='matrix(0.855,0,0,0.855,15.66,15.66)'%3e%3cpath%20d='M60%2042H156a28%2028%200%200%201%2028%2028V158Q184%20168%20174.47%20164.96L124.53%20149.04Q115%20146%20105%20146H60a28%2028%200%200%201-28-28V70a28%2028%200%200%201%2028-28Z'%20fill='%23FFFFFF'/%3e%3c/g%3e%3c/g%3e%3c/g%3e%3c/svg%3e)
 Yugenki
상품 설명
Twitter: https://x.com/Yugenki_VRC
Test the Glasses System: https://vrchat.com/home/avatar/avtr_ac65df1a-f742-4596-b256-9a231cabd165
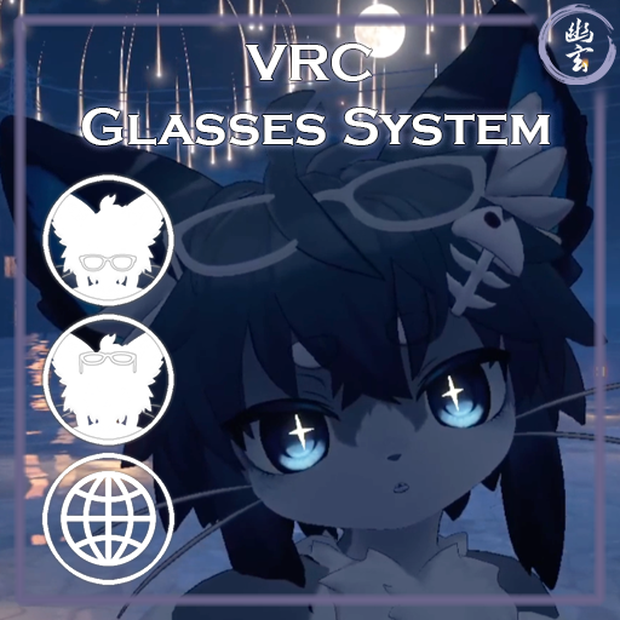
With this user-friendly installation tool, you can effortlessly transition your personal glasses from your face to your head, hands, or even leave them within the virtual world!
This package require:
- VRCFury or Modular Avatar (Used for installation)
* https://vrcfury.com/download/
* https://modular-avatar.nadena.dev/
- 7 Parameters.
- 5 Contact Receivers.
- 2 Contact Senders.
- 1 VRC Parent Constraint (Quest Compatible!)
User Instructions:
- All the interactions are made using the Gesture "Gun" (Number 6 of the "GestureLeft" and "GestureRight" parameters).
00:00 Demostration
00:26 Radial Menu
00:46 Installation Instructions
03:32 Change Glasses
[06/03/2024]
- (1.01) Added Modular Avatar option to Install Glasses, it uses same process as VRCFury.
[06/04/2024]
- (1.02) Created an extra prefab for big avatars, Contacts were rezised for that version.
[08/18/2024]
- (1.03) Adapted to use VRC Parent Constraint (Now is Quest Compatible!)
[11/16/2024]
- (1.04) Added a new toggle to enable/disable contacts, to avoid accidentally grabbing the glasses!
---------------------------------------------------
Twitter: https://x.com/Yugenki_VRC
グラスシステムをテスト: https://vrchat.com/home/avatar/avtr_ac65df1a-f742-4596-b256-9a231cabd165
この使いやすいインストールツールを使えば、あなたの個人用グラスを顔から頭や手、さらにはバーチャル世界に残すことさえ簡単にできます!
このパッケージに必要なもの:
- VRCFury または Modular Avatar(インストール用)
* https://vrcfury.com/download/
* https://modular-avatar.nadena.dev/
- 7つのパラメータ
- 5つのコンタクトレシーバー
- 2つのコンタクトセンダー
- 1つのVRCペアレントコンストレイント(クエスト互換!)
ユーザー手順:
- すべてのインタラクションはジェスチャー「ガン」("GestureLeft" および "GestureRight" パラメータの6番目)を使用して行います。
00:00 デモンストレーション
00:26 ラジアルメニュー
00:46 インストール手順
03:32 グラスの変更
[2024年6月3日]
- (1.01) グラスをインストールするためのModular Avatarオプションを追加しました。VRCFuryと同じプロセスを使用します。
[2024年6月4日]
- (1.02) 大きなアバター用に追加のプレハブを作成し、そのバージョンのためにコンタクトを再調整しました。
[2024年8月18日]
- (1.03) VRCペアレントコンストレイントを使用するように適応しました(クエスト互換になりました!)
こちらが日本語訳です:
[2024年11月16日]
- (1.04) 新しいトグルを追加しました。コンタクトレンズを有効/無効にすることで、誤ってメガネを掴むのを防ぎます!
Installation instructions
Use Instructions:
- All the interactions are made using the Gesture "Gun" (Number 6 of the "GestureLeft" and "GestureRight" parameters).
1. Add the Glasses Prefab
- If your avatar is big (1.7 or above) i would recommend use the "Big Avatar" prefab version
- Place the "Glasses Prefab" at the root of your avatar in the Hierarchy window.
2. Position the Glasses on the Face
- Move "MOVE THIS - Glasses Face Position" until the glasses are correctly placed on the avatar's face.
- To scale the glasses:
- Navigate to "Glasses Prefab" -> "Glasses Container" -> "Glasses" -> "Glasses - REPLACE WITH YOUR GLASSES".
- Adjust the scale values in the Inspector window as needed.
3. Set the Parent Constraint for Head Position
- Go to Glasses Prefab -> Glasses World Constraint -> Glasses Container.
- In the Inspector window, locate the VRC Parent Constraint component.
- Change the values to 0 1 0 0 to move the glasses to the head position.
4. Position the Glasses on the Head
- Move "MOVE THIS - Glasses Head Position" until the glasses are correctly placed on the avatar's head.
5. Set the VRC Parent Constraint for the Hands
- Repeat step 4 and 5 for the left and right hands using the following values for the Parent Constraint:
- Left Hand: 0 0 1 0
- Right Hand: 0 0 0 1
- After that set the VRC Parent Constraint to 1 0 0 0
6. Upload or Test the Avatar
- When you upload or test the avatar, VRCFury will handle the rest of the installation automatically.
Replacing the Glasses:
1. Navigate to the Glasses Component
- Go to "Glasses Prefab" -> "Glasses Container" -> "Glasses" -> "Glasses - REPLACE WITH YOUR GLASSES".
2. Position Your Glasses
- Place your own glasses in the same location as "Glasses - REPLACE WITH YOUR GLASSES".
3. Adjust Placement
- Move/scale your glasses to occupy the same space accurately.
4. Remove the Placeholder Glasses
- Delete "Glasses - REPLACE WITH YOUR GLASSES".
インストール手順
使用手順:
- すべてのインタラクションはジェスチャー「ガン」("GestureLeft" および "GestureRight" パラメータの6番目)を使用して行います。
1. グラスのプレハブを追加する
- あなたのアバターが大きい場合(1.7以上)、"Big Avatar" プレハブバージョンの使用をお勧めします。
- "Glasses Prefab" をヒエラルキーウィンドウでアバターのルートに配置します。
2. グラスを顔に配置する
- "MOVE THIS - Glasses Face Position" を移動させて、グラスをアバターの顔に正しく配置します。
- グラスのスケールを調整するには:
- "Glasses Prefab" -> "Glasses Container" -> "Glasses" -> "Glasses - REPLACE WITH YOUR GLASSES" に移動します。
- 必要に応じてインスペクタウィンドウでスケール値を調整します。
3. 頭の位置にペアレントコンストレイントを設定する
- "Glasses Prefab" -> "Glasses World Constraint" -> "Glasses Container" に移動します。
- インスペクタウィンドウでVRCペアレントコンストレイントコンポーネントを見つけます。
- 値を0 1 0 0に変更して、グラスを頭の位置に移動します。
4. 頭にグラスを配置する
- "MOVE THIS - Glasses Head Position" を移動させて、グラスをアバターの頭に正しく配置します。
5. 手のためにVRCペアレントコンストレイントを設定する
- 左右の手に対して、以下の値を使用してペアレントコンストレイントを設定します:
- 左手: 0 0 1 0
- 右手: 0 0 0 1
- その後、VRCペアレントコンストレイントを1 0 0 0に設定します。
6. アバターをアップロードまたはテストする
- アバターをアップロードまたはテストすると、VRCFuryがインストールの残りの部分を自動的に処理します。
グラスを置き換える場合:
1. グラスコンポーネントに移動する
- "Glasses Prefab" -> "Glasses Container" -> "Glasses" -> "Glasses - REPLACE WITH YOUR GLASSES" に移動します。
2. 自分のグラスを配置する
- 自分のグラスを "Glasses - REPLACE WITH YOUR GLASSES" と同じ場所に配置します。
3. 配置を調整する
- 自分のグラスを正確に同じ位置に移動/スケールします。
4. プレースホルダーグラスを削除する
- "Glasses - REPLACE WITH YOUR GLASSES" を削除します。
모든 리뷰
더보기리뷰 등록
리뷰를 작성하려면 로그인이 필요합니다.
로그인하고 리뷰 쓰기